

    |
 |
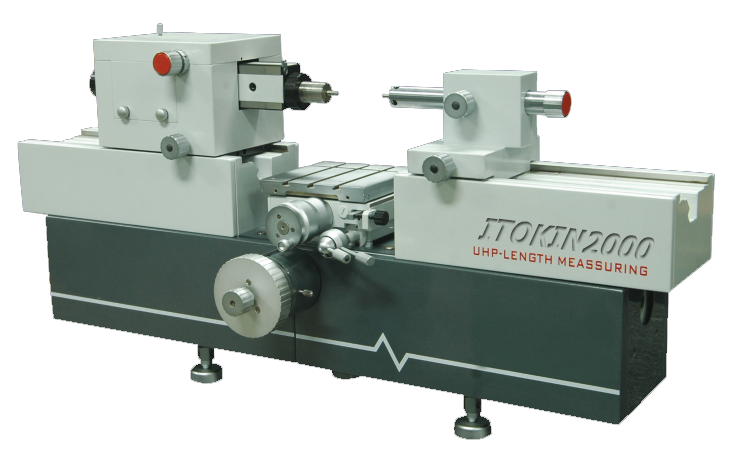
| ŕ¤Ă×čͧÁ×ÍĘÓËĂŃşĘÍşŕ·ŐÂş Universal Length Measuring Machine ULM-670 ŕ¤Ă×čͧÁ×ÍĘÓËĂŃşĘÍşŕ·ŐÂş Universal Length Measuring Machine ULM-670
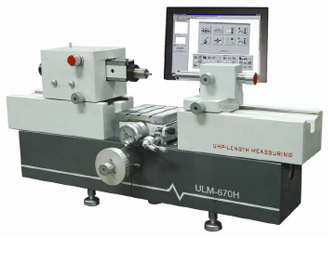
The Universal Length Measurer (ULM)is a kind of length measuring instrument integrated fine mechanics, optical system and electrical parts into an organic whole. This instrument is used for direct measurement and comparative measurement for dimensions of parts and components and makes special-purpose extra-equipment to the instrument carry out various special measurements. The scope of uses is as follows: ULM-670 ŕ¤Ă×čͧÁ×ÍĘÓËĂŃşĘÍşŕ·ŐÂş The measurement of the parallel plane for the measured piece, such as: measuring blocks; The measurement of the spherical dome for the measured piece, such as: length bars, steel balls; The measurement of the cylindroid for the measured piece, such as: circular cylinders.
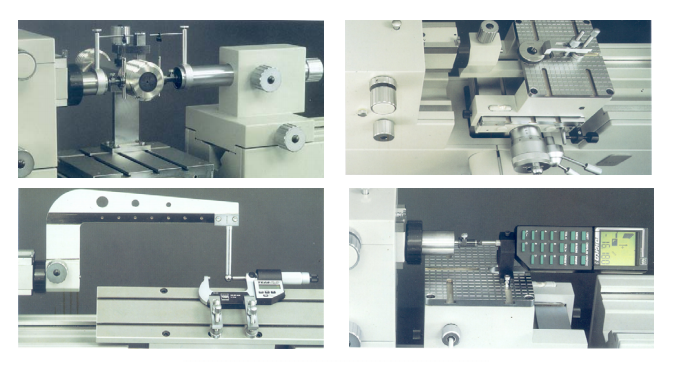
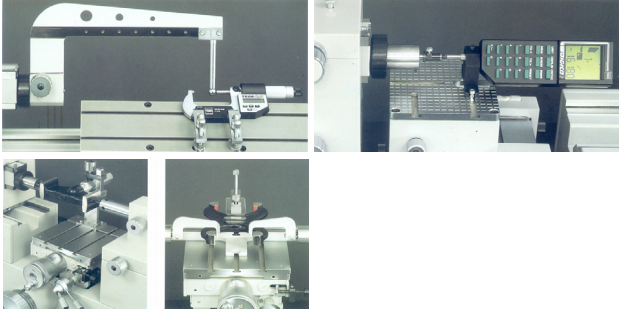
Internal dimensions The measurement of the parallel plane for the measured piece, such as: snap-gauge; The measurement of the aperture, such as: ring-gauges.
Screw thread
The measurement of external and internal effective diameter of threads. Comparative measurement The large-or-small movable measuring hooks are used to conduct comparative measurements for internal and external dimensions.
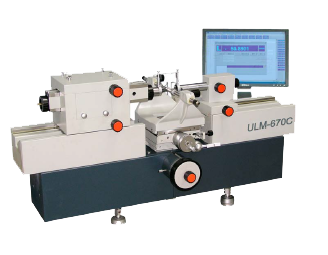
ULM-670C/D /ULM-670H Technical Parameter (ULM-670D with DRO, ULM-670C/670H with PC and software) Measuring range (mm): External size: Absolute measurement: 1-100 Comparative measurement: 0-670 Internal size When using small measuring hook (maximum insert depth 12, maximum wall thickness 50): 10-400 When using large measuring hook (maximum insert depth 50, maximum wall thickness 85): 30-370 When using electronic measuring hook: 1-60mm When using universal measuring hook: 14-112mm Measurement of internal thread mid-diameter: When using small measuring hook (thread small diameter 13-30mm) When using large measuring hook [thread small diameter 31 ~ (70 wall thickness) X 2 Thread distance: 0.5~6 mm Measurement of external thread mid-diameter: maximum 200mm, thread distance 1~6 mm Measuring force (N): 0, 1.5, 2.5 Digital resolution: 0.1um ULM-670H use HEIDENHAIN linear scale and reading card
Accuracy of instrument External size direct measurement ULM-670C/D: (0.5 + L/200) um ULM-670H: 0.4um Internal size measurement ULM-670C/D: (1 +L/100) um ULM-670H: 0.8um
Universal worktable Installment size of worktable: 160X160mm Adjusting range of height: 0 ~ 100 X axis travel: 25mm Inclination of workable (enclosuring Y axis ): ±3° Rotary angle of workable: ±4° Loading of worktable: 10kg
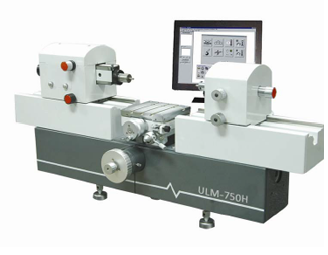
Measuring range (mm) External size Absolute measurement: 1-100 Comparative measurement: 0-750 Internal size When using small measuring hook (maximum insert depth 12, maximum wall thickness 50): 10-480 When using large measuring hook (maximum insert depth 50, maximum wall thickness 85): 30-450 When using electronic measuring hook: 1-60mm When using universal measuring hook: 14-112mm Measurement of internal thread mid-diameter: When using small measuring hook (thread small diameter 13-30mm) When using large measuring hook [thread small diameter 31 ~ (70 wall thickness) X 2 Thread distance: 0.5~6 mm Measurement of external thread mid-diameter: maximum 200mm, thread distance 1~6 mm Measuring force (N): 0, 1.5, 2.5 Digital resolution: 0.1um (HEIDENHAIN linear scale and reading card)
Accuracy of instrument: External size direct measurement ULM-750H: 0.2um ULM-750: 0.3um Internal size measurement ULM-750H: 0.6um ULM-750: 0.7um
Universal worktable: Installment size of worktable: 160X160mm Adjusting range of height: 0 ~ 100 X axis travel: 25mm Inclination of workable (enclosuring Y axis ): ±3° Rotary angle of workable: ±4° Loading of worktable: 10kg Mian Accessories
SOFTWARE «ÍżáÇĂě
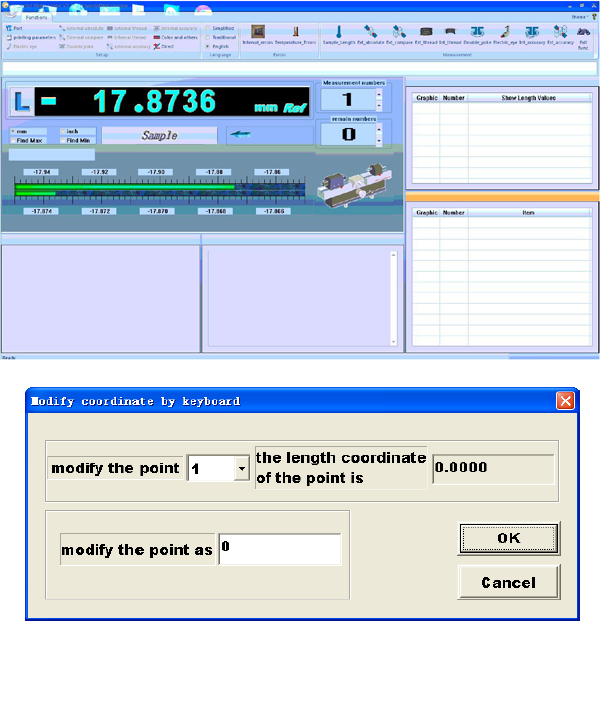
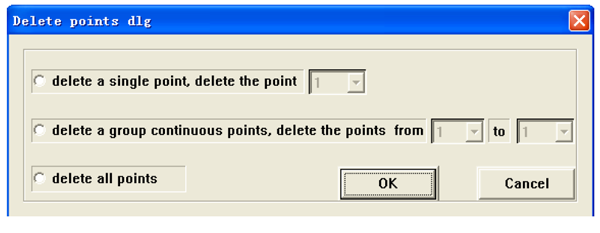
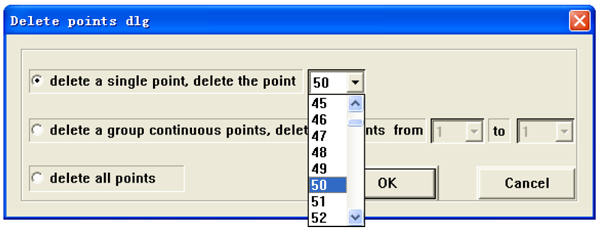
Function of software 1. Switch on the instrument and exceed zero After switch on the instrument, firstly, switch on the power of external device and then the turn on the computer. Thus the software begins to work, firstly appears the icon of our company and the cover of software, automatically hidden for a few moment. 2. Main display window If want to go into “ main display window”, you may select the item “main display window”. The reading value is displayed by big character above the screen: there are two line simulating scales and the upper line is coarse scale. The range is 0.20 and every unit is 0.0022. The marked figure is accordance with the current display value and the black part is the cursor. The place that the cursor is located is the current display figure, which is moved right and left along the change of the figure. When the cursor reaches the limit, the scale value adds or reduces a block and the cursor goes into from the other side again. The lower line is fine scale with range of 0.020 and every unit of 0.0002. The movement is same as the coarse scale. You will find out in later, it is convenient to find “reversal point” using this simulating scale. If the measuring axis does not exceed zero, on the upper side of big character will display: “Now are waiting for zero or not, please press zero button”. For high accuracy measurement. It must exceed zero and then be on other operations. Pressing the button “zero”, the reading value is zero. The read value can be sampled, saved and calculated by pressing the left or right mouse. When you find that the sample value is wrong, strike the button “Esc” to cancel the current the point. Pressing the related button can convert the Metric and Inch. Pushing button “Esc” can return to main menu and select required function. 3. Input data by keyboard If you need to input data through keyboard, strike the icon “keyboard input” and then appears the dialog box. Input relative data by the prompts and then press the button OK to display the current inputted data in the list. Press the button “cancel input” to cancel the current inputted data. At last, press the button “Esc” to finish input and return to main menu. The input coordinate can be on all kinds of calculations. 4. Display current all coordinate points If need to display or print current collected points, striking the “display coordinate” with the mouse is Ok. 5. Save current sampled point For save the current sampling point for long, it appears the dialog box . when striking the icon “save coordinate point”. The screen appears the hints that select path and input file name, then press the button “save” to ends. For example, to save the sampling point into your disk, set the file name as ShuJu, then select the path to enter the ShuJu and press the button “save”, thus the point is saved in the file of ShuJu. If the process has error, it will display error information. 6. Extract saved sampling points if desire to extract the saved coordinate, strike the icon “extract coordinate” 7. Modify sampling point by keyboard If find some coordinated that are wrong and need to correct, strike the icon “keyboard modify” by the mouse and then appear the Fig.6. You need to modify the sampled data, input the number of the point according to the prompts. Then enter correct value and press the button “OK”. 8. Delete sample points To delete some tedious and useless points, strike the icon “ delete coordinate” through the mouse and appear the dialog box as the Fig.7. There are following options: delete single point, delete a series continuous points (many series continuous points) and delete all sample points, now description as follows:
9. Delete single point If you want to delete one point, strike the first item in the figure 7, and this time the number selected will turn into bright from dark. Then choose the number in the bright place and press the button “OK” , thus can delete the point. For example, want to delete the fifth point, at first, make the selected serial number be bright and select the number 50, then press the button “OK”.
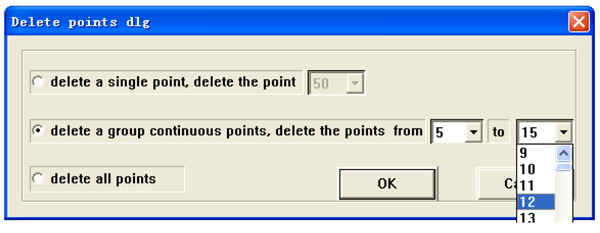
10. Delete a group continuous points The operation method is same as the above, strike the second item in the figure 7 by the mouse to make the number be bright. According to the prompts, select the number to be delete and press the button “OK” to delete a group points. For example, to delete the points from 5 to 15 of 30 points, only need to input the number 5 in the first prompt and number 15 in the second prompt. And then press the button “OK” to delete these points.(Repeating the operation, many groups continuous points can be deleted.). The rest sample points will be anew arranged. See the fig.8.
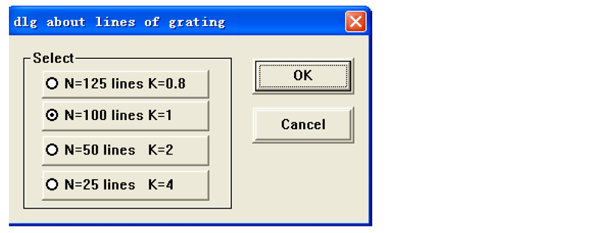
11. Delete all points To delete all sample points, strike the third item in the figure 7 using the mouse and press the button “OK” to delete all points. Press the button “Esc” to cancel current operation. 12. Select display value For the software can provide different gratings, it has the function of select the display value. We have adjusted the function before leaving factory, so user does not change it unless the model of main machine is changed. The method is: select the “select display value” of “rectify value” or strike the icon “select value”, then appear the dialog box as shown in the Fig.9. Select the options with mouse and then press “OK”.
13. Set new rectifying value The software can rectify the value error of the instrument. For the software is provided with the instrument, the rectify value has already been saved in it and the user does not change it unless the big error tested by inspecting department exists. The method is: select the “select display value” of “rectify value” or strike the icon “select value”, then appear the dialog box as shown in the Fig.10. The figure 10 shows the total rectifying values, which is rectifying value of error of the instrument. The gauge block can test the error. The tested points is a discrete point with space of 10 mm, and the starting points is located in the limit position of starting points of effective absolute range of the instrument. To modify the total rectifying value, input the new value again and press the button “OK”. User can enter the error value, “+” means bigger than the real value and “-“ is smaller than the real value. The software adopts the “superadding way”, that is, the user only can input the adding value with the keyboard. When some point need not add, it should input the “0”. Once saved, the new data cover the old data. Although input the discrete point, any length has the rectifying function for the software adopts math processing. User can zero in any position, the result is not changed.
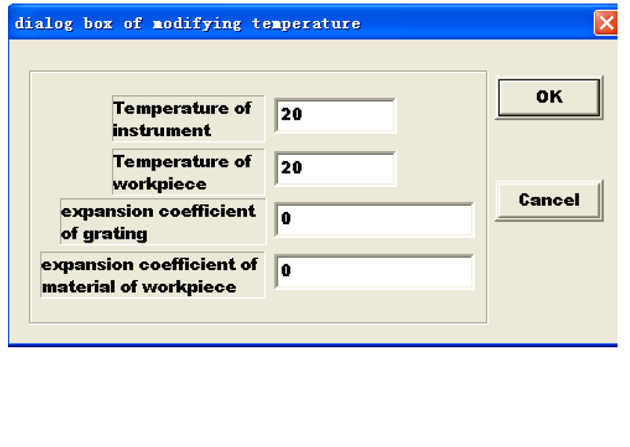
14. Rectify the temperature The screen appears the dialog box as the Fig. 11 when select the “rectify temperature” of “rectify value” or strike the icon “rectify temperature”. To modify the current temperature, user can input the new value in the dialog box. Where: 10.0e-6 means 10.0×10⁻⁶. Press the button “OK” to modify the temperature and “Esc” to cancel the operation. Fig. 11
15. Find “reversal point” For horizontal length instrument, it is common and base operation to find “reversal point”. After the instrument has the digital display function, it provides many strongpoints, but it is not convenient to find “reversal point” than the traditional instrument. The software uses the multi-function of computer to be on aided operation, it is easy for finding “ reversal point”. 15.1 Find the “reversal point” with simulation method The scale under the screen is the simulating scale of traditional optical instrument. The color block expands towards right, it means the size is increasing, vice versa. When find “reversal point”, first look the coarse scale and then fine scale to determine the fine position. 15.2 Automatically find the “reversal point” 16. Measuring smooth workpiece The measuring principle of measuring smooth workpiece. According to the hints under the screen, you may select required function and strike the relative icon with the mouse. 16.1 External direct measurement After select the function, the screen is shown in Fig.13. Firstly, user should check the parameters whether is same as your desire, then quit the page after modifying it. If have not sample the data, press the button “OK” to enter into displaying state, thus can measure, sample data. If need automatically find reversal point, select the item “finding reversal point”. After collecting the data in sequence, press the button “Quit” to display the result. If need to print the result, press the icon “printing result”.
|


 ŕ¤Ă×čͧÁ×ÍĘÓËĂŃşĘÍşŕ·ŐÂş Indicator Calibration Tester Model JYD-Series ŕ¤Ă×čͧÁ×ÍĘÓËĂŃşĘÍşŕ·ŐÂş Indicator Calibration Tester Model JYD-Series |
