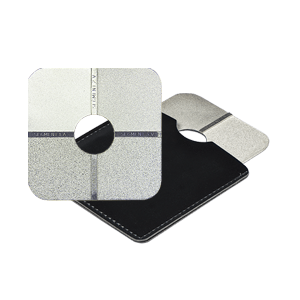
Surface Roughness Tester áĽčą·´ĘÍş¤ÇŇÁŕĂŐÂş
Model R2006 (PTE) Paint Test Equipment
ä´éĂŃşˇŇĂĂŃşĂͧµŇÁÁҵðҹĘҡŠCompliant to ISO 8503-1, ISO 8503-2 and ASTM D4417.
´ŇÇąěâËĹ´
áĽčą·´ĘÍş¤ÇŇÁŕĂŐÂşĽÔÇ ĂŘčą R2006 ¤ŘłŔŇľ¨Ňˇ »ĂĐŕ·ČÍѧˇÄÉ Paint Test Equipment (PTE) ăŞéĘÓËĂŃş·´ĘÍş¤ÇŇÁŕĂŐÂşĽÔǢͧŞÔ鹧ҹ ŕľ×č͵ĂǨĘÍşÇčŇŞÔ鹧ŇÁ ąŃéąć µĂ§µĂÁÇѵ¶Ř»ĂĐʧ¤ěËĂ×ÍäÁč ÁŐĽÔǢĂآĂĐ ĽÔÇËÂŇş ËĂ×ÍäÁč?


Surface Roughness áĽčą·´ĘÍş¤ÇŇÁŕĂŐÂşĽÔÇ ĂŘčą R2006
.png)
 |
 |
| áĽčą·´ĘÍş¤ÇŇÁŕĂŐÂşĽÔÇ |
âÁŕ´Ĺ R2006 |
 |
 |
| ÁŇľĂéÍÁŞŘ´¨Ń´ŕˇçşÍŘ»ˇĂłě |
¤ŘłŔŇľ¨Ňˇ»ĂĐŕ·ČÍѧˇÄÉ |
Product Description
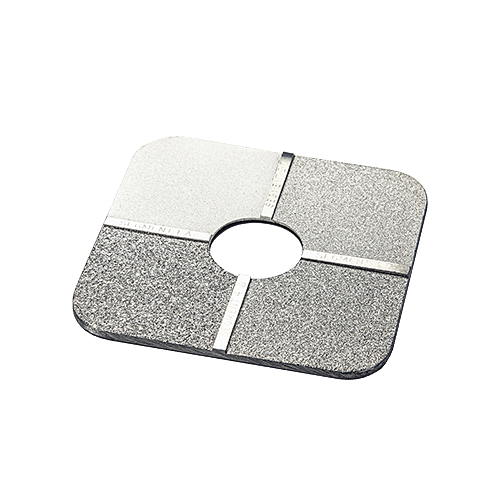
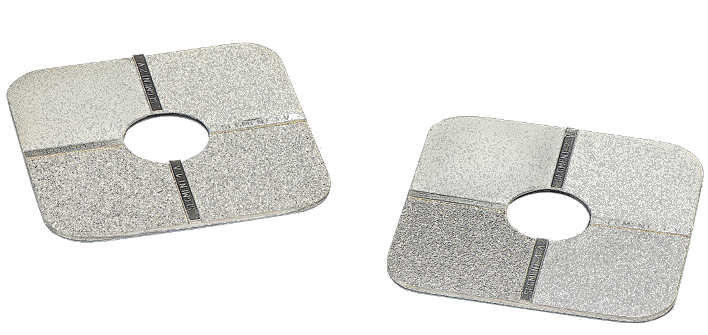
Surface Roughness Comparator for grit-blast and shot-blast surface profile comparison measurement of blast-cleaned steel.
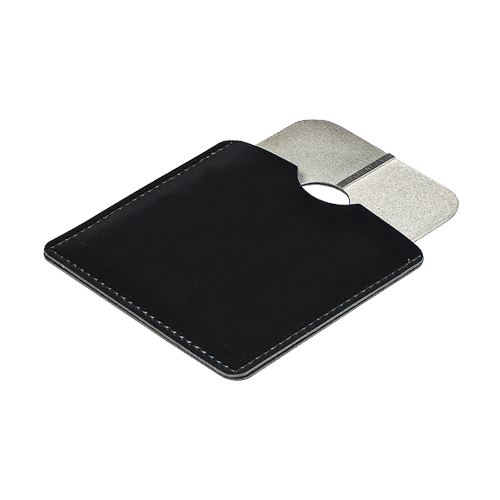
The Surface Roughness Comparator is supplied in a protective Wallet.
Compliant to ISO 8503-1, ISO 8503-2 and ASTM D4417.
Technical Specification
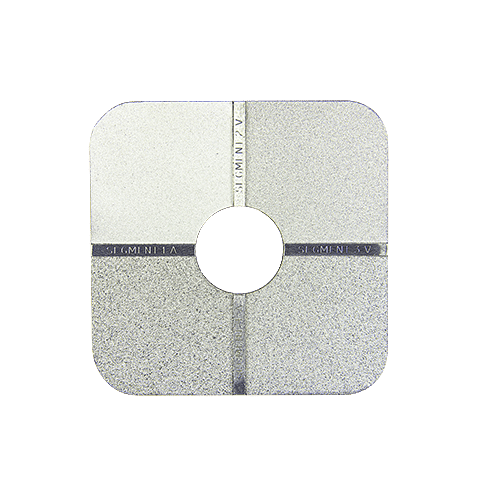
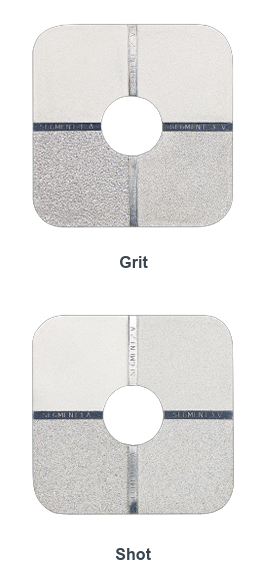
When steel has been blast-cleaned, the surface consists of random irregularities with peaks and valleys that are not easily characterised. Because of this random nature, it is recommended that the profile should be identified as either angular (where grit abrasives have been used) or dimpled (where shot abrasives have been used) and that they should be graded as fine, medium or coarse using the four segments on the Comparator.
Fine-grade profiles equal to segment 1 and up to but excluding segment 2. Medium-grade profiles equal to segment 2 and up to but excluding segment 3. Coarse-grade profiles equal to segment 3 and up to but excluding segment 4.

Information
ISO 8503-1: Preparation of steel substrates before application of paints and related products. Surface roughness characteristics of blast-cleaned steel substrates. Part 1: Specifications and definitions for ISO surface profile comparators for the assessment of abrasive blast-cleaned surfaces.
ISO 8503-2: Preparation of steel substrates before application of paints and related products. Surface roughness characteristics of blast-cleaned steel substrates. Part 2: Method for the grading of surface profile of abrasive blast cleaned steel. Comparator procedure.
A precision nickel Comparator plate for grit and shot-blast surface roughness comparison measurement.
When steel has been blast-cleaned, the surface consists of random irregularities with peaks and valleys that are not easily characterised. Because of this random nature, experts have recommended that the profile should be identified as either angular (where grit abrasives have been used) or dimpled (where shot abrasives have been used) and that they should be graded as fine, medium or coarse with each grade being defined by limits specified in ISO 8503.
The Roughness Comparator is supplied in a protective Wallet.
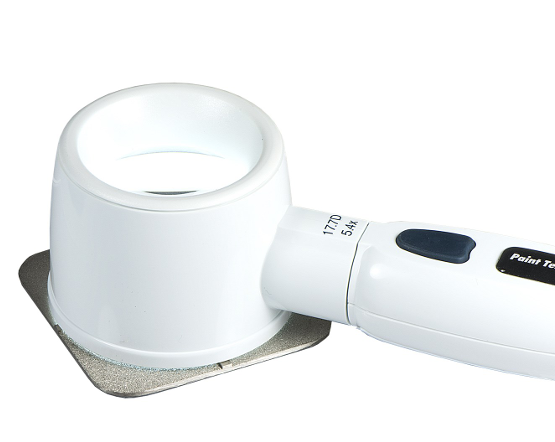
A X5 Illuminated Magnifier for viewing the Comparator is available has an optional extra.

The 5X Illuminated Magnifier is used for viewing the Roughness Comparator.
Roughness Comparator Specifications
| Model |
Comparator Type |
Profile Segment1 |
Profile Segment2 |
Profile Segment3 |
Profile Segment4 |
Conformance Cert Part No |
| R2006 |
Grit |
25µm |
60µm |
100µm |
150µm |
NRC01 |
| 1mils |
2.4mils |
4mils |
6mils |
|
| R2007 |
Shot |
25µm |
40µm |
70µm |
100µm |
NRC01 |
| 1mils |
1.6mils |
2.8mils |
4mils |
|
| R2011 |
Illuminated Magnifier X5. Includes Carrying Case |

Evaluation
Remove all loose dirt and debris from the test surface.
Select the appropriate surface profile reference Comparator. The Grit Comparator is for comparing profiles after blast-cleaning with grit abrasives, and the Shot Comparator is for comparing profiles after blast-cleaning with shot abrasives.
- Place the selected Comparator against an area of the test surface. Compare in turn the test surface with the four segments of the Comparator, using the Illuminated Magnifier if necessary. If the Illuminated Magnifier is used, place it so that the test surface is viewed simultaneously with a segment of the Comparator.
- Assess the profiles on the Comparator that are nearest to the profile of the test surface and determine its grade from the following:
- Fine-grade profiles equal to segment 1 and up to but excluding segment 2
- Medium-grade profiles equal to segment 2 and up to but excluding segment 3.
- Coarse-grade profiles equal to segment 3 and up to but excluding segment 4.
- If any profile is assessed as below the lower limit for the fine grading, assess this grading as finer than fine.
- If any profile is assessed as greater than the upper limit for the coarse grading, assess this grading as coarser than coarse.
- If visual assessment proves difficult, tactile assessment may provide a useful guide. It is possible to assess the closest grading by passing the back of a fingernail or a wooden stylus held between thumb and forefinger over the test surface and segments on the Comparator alternately.
Roughness Comparator Operation
Care
- Never place the Comparator face down on a rough surface. Keep the Comparator in the protective Wallet provided when not in use.
- If the Comparator becomes tarnished, wash with a Dilute detergent solution and soft brush and dry with soft tissue.
Practical Advice
- The Roughness Comparator method is applicable to steel surfaces that have been blast-cleaned to grades Sa 2½ and Sa 3 when the surface under test shows an overall blast-cleaned appearance.
- It is applicable to surfaces that have been cleaned with either metallic or non-metallic abrasives
- When a mixture of shot and grit abrasives are used to blast-clean a substrate, the Grit Surface Roughness Comparator should be used.
About Us
- Paint Test Equipment is a global leader in the manufacture of specialist test equipment specifically for the industrial painting and coating industries for the protection of steel assets from corrosion, mainly in the oil, renewables and steel construction sectors. We have over 30 years experience and extensive knowledge in delivering practical solutions in supporting our customers with world class products for corrosion prevention.
- Prevention of corrosion on steel is essential to extend the asset lifetime, optimise performance and minimise downtime for expensive maintenance work. Using Paint Test Equipment products ensures that industrial coatings are applied to the highest achievable quality standards of ISO compliance.
- We supply small, medium and multinational companies with the full range of technologies and innovations in our unrivalled portfolio of products for our customers to grow their business and enhance profits through cost effective corrosion management equipment.
- Paint Test Equipment is committed to providing proactive and innovative solutions to meet customer requirements for the highest quality, user friendly inspection equipment. Paint Test Equipment is the partner of choice.


 Surface Roughness Tester ŕ¤Ă×čͧ·´ĘÍş¤ÇŇÁŕĂŐÂşĽÔÇ iSurfa-520
  Surface Roughness Tester ŕ¤Ă×čͧ·´ĘÍş¤ÇŇÁŕĂŐÂşĽÔÇ iSurfa-100
  Digital Surface Volume Resistivity Meter ŕ¤Ă×čͧ·´ĘÍş¤ÇŇÁŕĂŐÂş Model MR43 (TRONOVO)
  Digital Surface Volume Resistivity Meter ŕ¤Ă×čͧ·´ĘÍş¤ÇŇÁŕĂŐÂş Model MR63 (TRONOVO)
  LeebS480 Surface Roughness Tester
  Surface Roughness Tester ŕ¤Ă×čͧ·´ĘÍş¤ÇŇÁŕĂŐÂş TMR 120
  Stand Roughness Tester á·čąÂÖ´¨ŃşŞÔ鹧ҹĘÓËĂŃşŕ¤Ă×čͧ·´ĘÍş¤ÇŇÁŕĂŐÂşĽÔÇ
  Surface Roughness Tester ŕ¤Ă×čͧ·´ĘÍş¤ÇŇÁŕĂŐÂş Model TMR-360 (TMTECK)
  Surface Roughness Tester ŕ¤Ă×čͧ·´ĘÍş¤ÇŇÁŕĂŐÂş Model TIME3223
  Surface Roughness Tester ŕ¤Ă×čͧ·´ĘÍş¤ÇŇÁŕĂŐÂş Model TIME3220
  Surface Roughness Tester ŕ¤Ă×čͧ·´ĘÍş¤ÇŇÁŕĂŐÂş Model TIME3210
  Surface Roughness Tester ŕ¤Ă×čͧ·´ĘÍş¤ÇŇÁŕĂŐÂş Model TIME3110
  Surface Roughness Tester ŕ¤Ă×čͧ·´ĘÍş¤ÇŇÁŕĂŐÂş Model TIME3221
  Surface Roughness Tester ŕ¤Ă×čͧ·´ĘÍş¤ÇŇÁŕĂŐÂş Model TIME3233
  Surface Roughness Tester ŕ¤Ă×čͧ·´ĘÍş¤ÇŇÁŕĂŐÂş Model TIME3231
  Surface Roughness Tester ŕ¤Ă×čͧ·´ĘÍş¤ÇŇÁŕĂŐÂş Model TIME3234
  Surface Roughness Tester ŕ¤Ă×čͧ·´ĘÍş¤ÇŇÁŕĂŐÂş Model DR-300
  Surface Roughness Tester ŕ¤Ă×čͧ·´ĘÍş¤ÇŇÁŕĂŐÂş Model SRT-350
  Surface Roughness Tester Laser Check ŕ¤Ă×čͧ·´ĘÍş¤ÇŇÁŕĂŐÂşĽÔÇ
  Surface Roughness Tester ŕ¤Ă×čͧ·´ĘÍş¤ÇŇÁŕĂŐÂşĽÔÇ Model TRL-400
  Surface Roughness Tester ŕ¤Ă×čͧ·´ĘÍş¤ÇŇÁŕĂŐÂş Model PRSR-110
  Surface Roughness Tester ŕ¤Ă×čͧ·´ĘÍş¤ÇŇÁŕĂŐÂş Model TMR-200
  Surface Roughness Tester ŕ¤Ă×čͧ·´ĘÍş¤ÇŇÁŕĂŐÂş Model AR-132C
  Surface Roughness Tester ŕ¤Ă×čͧ·´ĘÍş¤ÇŇÁŕĂŐÂş Model AR-132B
  Surface Roughness Tester ŕ¤Ă×čͧ·´ĘÍş¤ÇŇÁŕĂŐÂş Model SRT-200
  Surface Roughness Tester ŕ¤Ă×čͧ·´ĘÍş¤ÇŇÁŕĂŐÂş Model TR-200
  Surface Roughness Tester ŕ¤Ă×čͧ·´ĘÍş¤ÇŇÁŕĂŐÂş Model IS-14131
  Surface Roughness Tester ŕ¤Ă×čͧ·´ĘÍş¤ÇŇÁŕĂŐÂş Model SRT-6210
  Surface Roughness Tester ŕ¤Ă×čͧ·´ĘÍş¤ÇŇÁŕĂŐÂş Model PTS 103 PTS 104


.png)
