Coating Thickness Gauge PCE-CT 65
ĘÍş¶ŇÁĘÔą¤éŇä´é·Őč 02-9744354-6 ĘŇ´čÇą 088-7777277
Line : @itokin2000.com
Email : salesitokin@gmail.com
Coating Thickness Gauge (PCE)
ŕ¤Ă×čͧ·´ĘÍş¤ÇŇÁËąŇĘŐ ĽÔÇŕ¤Ĺ×Íş ¨Ňˇ»ĂĐŕ·ČÍѧˇÄÉ (United Kingdom) U.K.
ŕ¤Ă×čͧÁ×ÍÇŃ´¤ÇŇÁËąŇĘŐ ŕ»çąŕ¤Ă×čͧÁ×ÍÇŃ´¤čҤÇŇÁ˹ҢͧĽÔÇŕ¤Ĺ×Íş ŕŞčą §ŇąŞŘş, §Ňąľčą ÇŃ´ä´é·Ńé§ Ferrous & Non Ferrous (âĹËĐ áĹĐÍâĹËĐ)
´ŇÇąěâËĹ´Ę໡


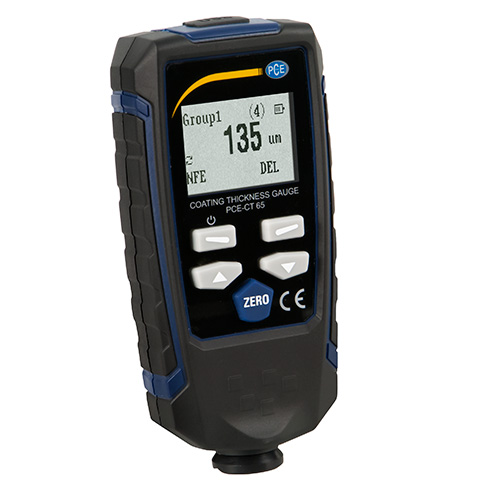
PCE-CT 65 Coating Thickness Gauge
Non-destructive coating and dry film thickness (DFT) measuring device for use on ferrous and non-ferrous metal substrates
PCE-CT 65 is a coating thickness gauge that uses magnetic induction (ferrous) or eddy current (non-ferrous) to take non-destructive measurements of coating and dry film thickness (DFT) on metal substrates such as steel and aluminum. This thickness gauge is ideal for painted and powder-coated surface testing, automotive paint inspection, coated material testing, and manufacturing quality control applications.
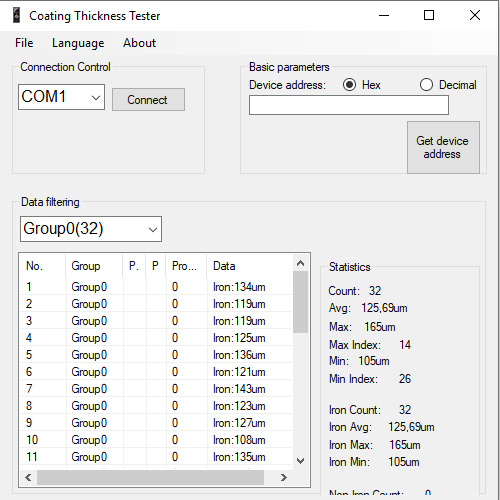
The easy-to-use downloadable PC-compatible software included with this thickness gauge allows for detailed analysis of measurement results via computer. Measurement values are shown in a table and different working modes can be selected for data filtering. Statistics include the maximum, minimum and average value per working group. Statistics can be divided by ferrous and non-ferrous material. The software also counts how many readings have been stored in each material group. For more details, please refer to the user manual.
Software

- Includes calibration shims and blocks for DIY accuracy testing, a carrying case for easy transport, and a 2-year warranty against manufacturer defects
- Optional ISO calibration certificate available for purchase separately - see accessories tab for details
- Features two measuring modes (ferrous and non-ferrous) with integrated sensors for comfortable, one-handed operation
- Saves up to 1500 measurements to memory
- Comes with a USB cable and downloadable PC software (see downloads tab) for detailed analysis of measurement results via computer
F (Ferrous Metals)
| Principle |
Magnetic induction |
| Measuring range |
0 ... 1350 µm / 0 ... 53.1 mils |
| Accuracy |
0 ... 1000 µm: (±2.5 % ±2 µm)
1000 µm ... 1350 µm: ±3.5 %
0 ... 39.3 mils: (±2 % ±0.08 mils)
39.3 mils ... 53.1 mils: ±3.5 % |
| Resolution |
0 ... 100 µm: 0.1 µm
100 µm ... 1000 µm: 1 µm
in 1000 mm ... 1350 µm: 0.01 mm
0 ... 10 mils: 0.01 mils
10 mils ... 53.1 mils: 0 ... 1 mils |
| Smallest surface |
Ø 7 mm / Ø 0.3 in |
| Min. curvature radius |
1.5 mm / 0.05 in |
| Min. substrate thickness |
0.5 mm / 0.02 in |
FN (Non-Ferrous Metals)
| Principle |
Eddy current |
| Measuring range |
0 ... 1350 µm / 0 ... 53.1 mils |
| Accuracy |
0 ... 1000 µm: ±(2.5 % ±2 µm)
1000 µm ... 1350 µm: ±3.5 %
0 ... 39.3 mils: ±(2 % ±0.08 mils)
39.3 mils ... 53.1 mils: ±3.5 % |
| Resolution |
0 ... 100 µm: 0.1 .mu.m
100 µm ... 1000 µm: 1 µm
in 1000 mm ... 1350 µm: 0.01 mm
0 ... 10 mils: 0.01 mils
10 mils ... 53.1 mils: 0 ... 1 mils |
| Smallest surface |
Ø 5 mm / Ø 0.2 in |
| Min. curvature radius |
3 mm / 0.1 in |
| Min. substrate thickness |
0.3 mm / 0.01 in |
| Units |
µm, mils |
| Functions |
Alarm function, display lighting, automatic shutdown, calibration, memory function |
| Memory option |
30 storage groups with a capacity of 50 measurements each = 1500 measurements total |
| Interface |
USB |
| Environmental conditions |
0 ... 40°C / 32° F ... 104°F, 20% ... 90% rh |
| Power supply |
2 x 1.5V AAA batteries |
Box Set
1 x PCE-CT 65 Coating thickness gauge
2 x 1.5V AAA batteries
5 x Calibration shims
2 x Calibration blocks (aluminum and iron)
1 x USB cable
1 x User manual
1 x Carrying case
1 x ISO calibration certificate
Note: The PC software is available for download via the downloads tab of our website.


 Coating Thickness Gauge PCE-USC 30
  Coating Thickness Gauge PCE-CT 5000H
  Coating Thickness Gauge PCE-CT 100N
  Coating Thickness Gauge PCE-CT 90
  Coating Thickness Gauge PCE-CT 80
  Coating Thickness Gauge PCE-CT 28
  Coating Thickness Gauge PCE-CT 27FN
  Coating Thickness Gauge PCE-CT 26FN
  Coating Thickness Measuring Device PCE-CT 25FN
  Coating Thickness Gauge PCE-CT 24FN
  Coating Thickness Gauge PCE-CT 10


